Category: hybrid energy

Light Up 2024 with Solar Power Store’s Amazing New Bifacial Solar Panels – Double the Power, Double the Impact!

Welcome to the Future of Solar Energy with Power My Home and Energy Economics!

If you’ve been exploring new solar panels, you’re in the right place. In our pursuit of staying ahead in the game and ensuring a lifetime assurance for your purchases, we are thrilled to introduce you to our latest innovation: the Bifacial Solar Panel. As we step into the new year of 2024, let’s embark on a journey to discover the incredible potential and advantages of these cutting-edge solar panels brought to you by Power My Home and Energy Economics.

Unlocking the Power of Bifacial Solar Panels:

So, what sets apart the Bifacial Solar Panel? It’s simple—they capture sunlight from both sides, doubling their efficiency and impact. Today, let’s delve into the intricacies of these panels, exploring their effectiveness, advantages, costs, installation tips, and more.

Understanding Bifacial Solar Panels:

A Bifacial solar panel is designed with photovoltaic cells that capture sunlight from both the front and back sides, utilizing reflected light from the ground or other surfaces. Unlike traditional monofacial solar panels, which capture sunlight from only one side, Bifacial Solar Panels can achieve an efficiency boost of up to 30%. This unique feature allows them to harness additional solar energy, especially in environments with reflective surfaces like snow, water, or light-colored terrain.

Harvesting Reflected Light:

Sunlight contains the power of reflection off various substances and surfaces, including ground surfaces. Bifacial cells capture this reflected light, a phenomenon referred to as “Albedo.” This makes Bifacial Solar Panels particularly effective in environments with reflective surfaces, enhancing their efficiency in capturing sunlight.

Types of Bifacial Solar Panels:

  1. Glass-Glass: Exceptional strength and resistance to heavy loads.
  2. Glass-Transparent Back sheet: Efficient bifacial operation with a more cost-effective approach.
  3. Glass-Back sheet: A good balance between efficiency and affordability.

Advantages of Bifacial Solar Panels:

  • Generate 30% more power with dual-sided efficiency.
  • Ideal for ground installations, outperforming rooftop installations.
  • Durability in harsh weather conditions, especially double glass panels.
  • Cost-effective when used in tracking systems, cutting costs by up to 16%.
  • Versatile for various installations, including glass-covered structures.

Disadvantages of Bifacial Solar Panels:

  • Higher initial costs due to increased manufacturing materials.
  • Not suitable for shaded or non-reflective areas.
  • Heavier than regular panels, complicating handling and adjustment.

Installation Considerations:

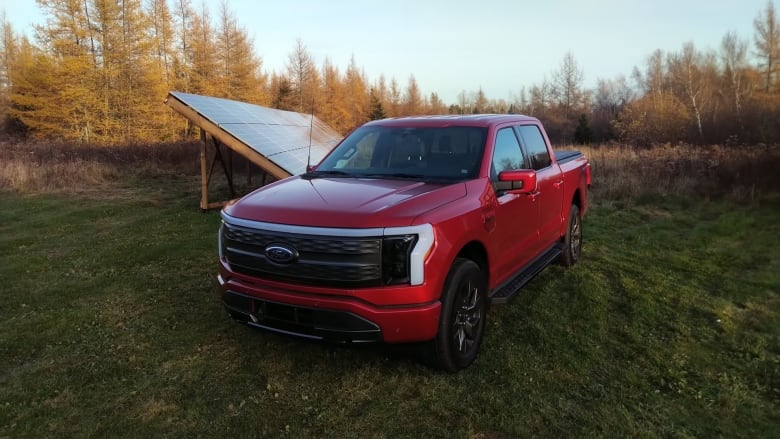
  • Ground-mounting: Ideal for maximizing reflection from various surfaces.
  • Roof-tops mounting: Less efficient on rooftops due to shading limitations.
  • Floating: Suitable for water surfaces, enhancing overall energy generation.

Expenses of Installing Bifacial Solar Panels:

While Bifacial Solar Panels come with a slightly higher price tag compared to monofacial panels, their enhanced energy production often balances out the additional upfront cost. Generally, expect a bifacial panel to be priced approximately 10 to 20 cents per watt more than its monofacial counterpart.

Cell Structures of Bifacial Solar Panels:

Several cell structures, including PERT, PERL, PERC, IBC, and HIT, offer varying efficiencies and bifacial capabilities. Choose the one that best suits your energy needs.

Effectiveness for Rooftops:

Bifacial Solar Panels are less efficient on rooftops due to shading limitations. Optimal functionality requires substantial space to prevent shading and facilitate effective absorption of reflected light.

Mounting Procedures:

  • Ground-mounting: Offers versatility for capturing light from various angles.
  • Roof-tops mounting: Requires fine-tuning of positioning and tilt for optimal absorption.
  • Floating: Suitable for water surfaces, enhancing overall energy generation.

Installation Tips:

  • Organize spaces under bifacial panels to minimize shadowing.
  • Maintain a minimum height of 101cm above the ground, as per IEEE recommendations.
  • Ensure the strength of mounting systems for proper support.
  • Opt for vertical alignment to reduce back panel blockage and aid in snow removal.
  • Consult a solar expert for the best bifacial panel height.

As we step into 2024, let’s embrace the future of solar energy with Power My Home and Energy Economics’ Bifacial Solar Panels. Double the power, double the impact—because a brighter, sustainable future starts with innovation.

Light up your world with Power My Home and Energy Economics! Visit www.powermyhome.ca

ðŸĄðŸŒŋ Attention Homeowners in Canada: Don’t Miss Out on the Greener Grant Home Opportunity! Act Now! ðŸ‡ĻðŸ‡Ķ💚

The clock is ticking, and the opportunity to transform your home into an eco-friendly haven with the Greener Grant Home is slipping away. 🕒 As of now, a staggering 65% of the funds allocated for this incredible federal government initiative have already been snapped up. 🌟

🌞 Imagine lower energy bills, reduced carbon footprint, and increased comfort within your home. The Greener Grant Home can make this vision a reality.

ðŸ’Ą Here’s why you should seize this opportunity NOW:

ðŸŒą Unparalleled Savings: With up to 65% of the funds already allocated, there’s no time to waste. The Greener Grant Home offers substantial financial incentives to make your home more energy-efficient, from insulation upgrades to efficient heating systems.

💚 Environmental Impact: Every energy-efficient upgrade you make through the Greener Grant Home reduces your carbon footprint and contributes to Canada’s commitment to sustainability and a greener future for generations to come.

🏠 Enhanced Home Value: Say goodbye to chilly winters and sweltering summers. With the Greener Grant Home, you can enjoy year-round comfort in your home, and the installation of solar panels ensures your home value goes up, contributing to a sustainable and financially sound future.

💰 Long-Term Savings: Lower energy bills are a given when you make your home more energy-efficient. These savings continue to add up over the years, making your investment in a greener home a wise financial decision.

ðŸĪ Don’t miss out on this golden opportunity to enhance your home’s energy efficiency while saving money and reducing your environmental impact. The clock is ticking, and funds are running out!

🚀 Act NOW and take the first step toward a Greener Home. Reach out to us for a FREE assessment or visit the official Greener Grant Home website to learn more and start your application process. Your future self and the planet will thank you! 🌎🌟

#GreenerHome #EnergyEfficiency #Sustainability #GreenLiving #Canada #FederalInitiative #ActNow #EnvironmentallyFriendly #HomeImprovement

Let’s make our homes greener and our planet brighter together! ðŸĄðŸŒŋðŸ’Ą


Click Here For Details (PDF File)

A green machine: New Brunswicker uses solar to power his electric pickup truck

‘There’s probably going to be a huge demand in the future’

A red Ford truck parked next to an angled collection of solar panels. There are orange trees in the background.


A future landscape for many might include an electric vehicle powered by a solar grid that can run electricity for a home when the power goes out.

But it’s not that futuristic for one New Brunswick man. In fact, it’s his reality.

Cory Allen, who lives in Nasonworth, N.B., switched to electric vehicles in 2019, beginning with an SUV.

He said he still had a gas car in the garage at the time because, like many people, he was skeptical.

More recently, he got an electric pickup truck, the Ford F-150 Lightning. He said it has some “really cool” features, including being able to “back feed” electricity into the house.

In the event of a power outage, Allen’s automatic standby generator would kick in, which he said would cost around $6 or $7 per hour to run.

But then he could go to the garage and flick a transfer switch that would allow the truck to power the house. He said the truck can power the house for around two days before needing a charge.

A man wearing a navy blue collared shirt standing in front of a mountain landscape

Not only that but the truck is charged using solar energy.

Allen had a 12.8-kilowatt array of solar panels installed that feed into the garage where vehicles are charged. He said the truck takes around eight hours to go from zero power to a full charge.

He said he went with a grid-tied solar system for his home, which is different than a standard setup, so there’s no battery component.

He said when the vehicles are charging, they will take all of the solar energy that’s being produced. But when they are not actively using all of the solar energy, the meter will run backward and the power will be banked for when they need it, Allen said.

His panels are on a wooden frame in the field by his house. That was more cost-effective than putting them on the roof of his home since the field has a better southern exposure, which means increased sunlight.

Not a lot of public knowledge

The idea for the setup originally came from Epic Energy, a New Brunswick solar energy company, when Allen approached them about a solar array.

“The electrician came over and we began talking and â€Ķ he just offered so many of these awesome ideas,” said Allen.

Richard Knappe, president of Epic Energy, said there isn’t a lot of public knowledge about using solar to power electric vehicles, but they have had conversations with interested clients.

He said there also aren’t many vehicles that have the necessary technology.

“There’s probably going to be a huge demand in the future,” said Knappe. “But right now, we’re pretty limited to the F-150 Ford, and the Hyundai IONIQ 5.”

When it comes to setting up these types of systems, the wiring does get pretty complicated, he said. Knappe has an electrician who does this work, but he said it is hard to find electricians with that particular knowledge.

Long-term financial benefit

Allen said having an electric vehicle is also a long-term financial benefit for him.

He said the truck is expensive upfront at roughly $100,000. Then there is around $11,000 for the solar array and about $7,000 for the electrical work.

But the cost makes sense in the long run, Allen said.

He said as a small business owner who travels a lot, he was spending a lot on gas to fuel a pickup truck.

But without having to buy gas, he said his monthly payments come out to less since he’s only making payments on the truck.

Allen said one of the things that makes him feel good about his setup is the carbon footprint.

He said there is a heavy carbon footprint at the outset for the production of electric vehicles and solar panels. But, after using them for around five years, he said his household could be net zero.

He said environmental concerns are always something he tries to keep on top of his mind.

“I often joked, ‘Well, at least I’m offsetting the gas I put through the truck with the car,'” said Allen. “But now we have the electric car and the truck, so I don’t even have to worry about that joke anymore.”

Vanadium Redox Flow Battery “VRFB” 101

Vanadium Infographic 1


The Vanadium Redox Flow Battery

The VRFB is a type of rechargeable flow battery where rechargeability is provided by vanadium electrolyte (VE) dissolved in solution. The two tanks of Vanadium, one side containing V2+ and V3+ ions, the other side containing V4+ and V5+ ions, are separated by a thin proton exchange membrane.  VRFBs consists of two tanks of vanadium electrolyte that flow adjacent to each other past a membrane and generate a charge by moving electrons back and forth during charging and discharging. This battery offers unlimited energy capacity simply by using larger electrolyte storage tanks. It can be left completely charged for long periods without losing capacity and maintenance is much simpler than other batteries. Pumps on both sides circulate the electrolyte.

The electron differential between the two cells generates electric power. Most batteries use two chemicals that change valence (or charge or redox state) and cross-contaminate and thus degrade over time. VRFBs utilize multiple valence states of vanadium as a single element to store and release charge. The VRFB has no cross-contamination like most batteries. The electrolyte in the catholyte and the anolyte consists of 100% vanadium ions. The ion-sensitive membrane separating both sides of the electrolyte tank allows only protons to pass. VRFBs are containerized, long duration, non-flammable, compact, reusable over infinite cycles, and last more than 20 years.

What are the advantages of Vanadium Redox Flow Batteries?

  • VRFBs have a lifespan of 20+ years
  • VRFBs offer immediate energy release
  • VRFBs are suitable for grid connection or off-grid settings – ideal for renewable energy
  • VRFBs can discharge 100%, without any damage to the battery
  • VRFBs are non-flammable
  • They ensure power and energy can be scaled independently
  • Vanadium electrolyte can be re-used and does not need to be disposed of
  • The batteries can be cycled more than once per day
  • They use only one element in the electrolyte – V2O5
  • VRFB energy storage guarantees uninterrupted power supply

How does a Vanadium Redox Flow battery (VRFB) work?

  • A flow battery is charged and discharged by a reversible reduction-oxidation reaction between the two liquid vanadium electrolytes of the battery
  • Unlike conventional batteries, electrolytes are stored in separated storage tanks, not in the power cell of the battery
  • During operation, these electrolytes are pumped through a stack of power cells, in which an electrochemical reaction takes place and electricity is produced


Can You Connect Solar Panels Directly 2 Battery

Can You Connect Solar Panels Directly To Battery?


A typical solar system has a charge controller situated between the solar panels and the battery. But is it that necessary? Can you connect solar panels directly to a battery? What would happen if you do?

A solar panel generates up to 20 volts, which is higher than the 12 volts required by a battery. Connecting the solar panels directly to the battery could overcharge and damage the battery.

What Happens If You Connect Solar Panels Directly To A Battery?

When sunlight hits the cells on a solar panel, it produces a chemical reaction and generates direct current (DC). The solar panel transmits this current into the battery. The current is used to charge the battery and can also be used to run appliances and other devices.

If the solar panel is directly connected to the battery, all of the currents are placed in the battery. A 12V battery needs only 12 volts, at most 14.4.V to charge. A 12V solar panel produces up to 20V.

If you put 20 volts in a 12-volt battery, it will overcharge. This is going to damage the battery and whatever device or appliance is connected to it.

By installing a charge controller like the Renogy 30A Charge Controller, this can be avoided. You place the charge controller between the solar panels and the battery, and it will regulate the current flowing into the system.

Why A Charge Controller Is Needed To Connect Batteries To Solar Panels

A charge controller manages the electrical current going into the battery, keeping it at a safe level. This device ensures the battery charges at the optimum level without the risk of overheating or overcharging. Some of the most important features of a charge controller are the following.

  • Display: the controller should display the solar panel amps, battery bank voltage, and charge level.
  • Customizable lighting control: for simplified operation
  • Auto low voltage connect / disconnect: turns on when the battery is charged and turns off when power is low
  • Multistate Charging: adjusts the battery power according to the battery’s charge level for optimum performance.

The battery installation depends on the solar panel system design. A lot of home solar panel systems today come with an inverter that simplifies battery configuration. If your system does not come with battery expansion capability, you have to replace the inverter.

Lead-acid batteries are the most widely and with good reason. Their electrical storage capacity is large and they discharge fast. However, lead-acid battery levels should not drop below 50% as it will shorten the lifespan.

Lead-acid batteries often have 2 V voltage and are made up of cells that generate the required power. In solar power batteries, that is 12 volts. These are called deep cycle batteries because they charge during the day and are discharged at night.

Sot the best way to avoid this is to install a charge controller. The controller will protect the battery and ensure only the right amount of current goes into the system. The following step-by-step guide shows you how it is done.

How To Connect A Charge Controller To A Battery And Solar Panel

Instead of connecting a battery directly to a solar panel, you should install a charge controller between the battery and the solar panel. The solar panel will charge the battery with current but the controller ensures only a safe amount goes into it. The following steps show how it is done.

Required Tools And Materials

  • Solar panel
  • Charge controller
  • Battery charge
  • Inverter (if you will use AC powered appliances)
  • Cable, wires, and connectors (these should be included in your solar panel kit)
  • Crescent wrench
  • Drill
  • Screwdriver
  • Electrical tape
  • Wirecutter
  • Eye protection (goggles are recommended when working with lead-acid batteries)
  • 12V deep cycle battery – we recommend 4.0 kWh Royer Lithium Battery 310 AH (LiFePo4)

The basic steps are:

  1. Connect the charge controller to the lead battery.
  2. Link the lead battery into the inverter.
  3. Connect the charge controller to the solar panels.
  4. To run, use the inverter to convert DC to AC, Clamp to the battery and turn the inverter on.

Step By Step Instructions

1. Prepare all the tools and materials. Set up the solar panel so you can link them to the main connector later on. Layout the panels first. Depending on your setup, an extension cord may or may not be required.

The wires should be covered for protection. If the battery is not yet charged, do this first. It’s a good idea to charge the battery while you set up the solar panels to save time. Make certain the battery’s negative terminal is on one side and the positive terminal on the other.

If your battery is already parallel, proceed to step 3. If not, cut the cables and make some jumpers. The bigger the inverter, the longer the cable, but chances are your solar panel already has cables ready.

2. Hook up the charge controller onto the lead battery. There should be a wire on the controller that you can hook up or clamp onto the battery. The inverter must be turned off first. If the controller is waterproof you can position it anywhere. If it isn’t, make sure it is in a secure location.

Charge controllers come with digital displays for easy access to your system, so the best place to install them is in your RV. When installed properly, you can use the controller to monitor the energy situation in your RV.

3. Hook up the lead battery to the solar inverter. The battery can be configured parallel to the other batteries in the system. To add more batteries, connect them with cables. Make sure the cables are linked to the proper terminals.

4. Link the battery controller to the solar panel. Run the line from the panel to the controller and it should be set. Depending on your setup, an extension cord may be required to connect the components.

Tips And Warnings

To test the system, turn on the inverter to convert DC to AC. Clamp to the battery and then activate the inverter. If everything is in order the system should run fine. Try different devices and check for signs of problems. Here are some more suggestions:

  • If you already bought a solar kit, follow the instructions given. Keep in mind that some of the steps in your solar panel kit may differ slightly. If you don’t want to manually put the whole thing together, look for solar panel system kits that require very little setup.
  • Double-check the wiring and cables. Make certain the connectors are tight and in the proper locations.
  • Run a test first to see if it works. Keep an eye on the charge controller and check if it’s controlling the voltage.
  • If the system does not run, check the wiring or if there is a loose screw somewhere. It is also possible the batteries are not installed correctly so look there first.
  • Your solar system kit comes with a manual and troubleshooting guide so use that as a reference.

How Long Does A Solar Panel Take To Charge A 12V Battery?

The charging time depends on the solar panel watt capacity and how much sunlight is available. It also depends on the battery and how much power is required.

A 12V 100ah battery holds up to 1200 watts. A 100-watt solar panel can produce 600 watts with six hours of sunlight. So if the weather is ideal, a 100W solar panel can recharge a 12V 100ah battery in two days.

That assumes the two days have full sunlight so the solar panel can produce 100 watts for six hours. In reality, this can only happen under the most ideal situations. Passing clouds, shading, and other factors affect solar power output. if the conditions are not good, it might take 3 days or so to recharge the battery.

What Are The Parts Of A Solar Power System?

Now, let’s take a look at the 4 main components: the solar panels, the charge controller, the inverter, and the battery. The following information makes it clear why you should never connect the batteries directly to a solar panel unless it runs off DC power.

Solar Panel. These are the most recognizable parts of a solar system. Also called solar stations or solar cells, these are available in different configurations. The most popular solar panels are those with 36 cells, capable of producing 18 to 21 volts.

Inverter. Solar panels produce direct current (DC) which is then stored in the battery. To use this power for home appliances, you need an inverter to convert it into an alternating current (AC). The inverter must be joined to the battery before it is connected to other AC appliances or devices.

Your solar battery generates 12-volt power, but the inverter changes this into 120 volts, making it usable and compatible with electrical devices. Inverters come in various forms and some are bundled with portable solar system kits.

Battery. The battery serves as the repository of all the energy that the solar panel produces. For RVs and home use, a 12V, deep cycle battery is recommended. These batteries can handle several discharges, which is what you’ll be needing. Without the battery, there is nowhere to store all the power the solar panel generates.

Solar Charge Controller. A battery charge controller acts as a voltage regulator for your solar power system. Think of the voltage regulator that you use with your computer and you get an idea of what a batter charge controller does.

Conclusion

Connecting solar panels to the battery is a simple, straightforward process, provided you know the steps. A lot of the mistakes people make is not taking the time to learn how a solar panel system works with batteries. By understanding the process you’ll save yourself a lot of trouble.

Different EV Charging Connector Types

Let’s start with AC. There are two types of AC plugs:

  • Type 1 is a single-phase plug and is standard for EVs from America and Asia. It allows you to charge your car at a speed of up to 7.4 kW, depending on the charging power of your car and grid capability. 
  • Type 2 plugs are triple-phase plugs because they have three additional wires to let current run through. So naturally, they can charge your car faster. At home, the highest charging power rate is 22 kW, while public charging stations can have a charging power up to 43 kW, again depending on the charging power of your car and grid capability.

Two types of plugs exist for DC charging:

  • CHAdeMO: This quick charging system was developed in Japan, and allows for very high charging capacities as well as bidirectional charging. Currently, Asian car manufacturers are leading the way in offering electric cars that are compatible with a CHAdeMO plug. It allows charging up to 100 kW.
  • CCS: The CCS plug is an enhanced version of the Type 2 plug, with two additional power contacts for the purposes of quick charging. It supports AC and DC charging. It allows charging at a speed of up to 350 kW. 

Now, what do you do if you live in Europe and drive an Asian car like the Nissan LEAF? Well, you need a cable that connects the type 2 plug of the charging station with the type 1 outlet of your vehicle (type 2 to type 1). The maximum speed will be up to 7.4 kW.

To summarize:

Four types of plug exist, two for AC (type 1 and 2) and two for DC (CHAdeMo and CCS).
Type 1 is common for American vehicles, it’s a single-phase plug and can charge at a speed of up to 7.4 kW.
Type 2 is standard for European and Asian vehicles from 2018 onwards, it’s a triple-phase plug and can charge at a level of up to 43 kW.
CCS is a version of type 2 with two additional power contacts. It allows very fast charging.
CHAdeMO can be found in Asian cars and allows for high charging capacities as well as bidirectional charging.

WHAT ARE THE NECESSARY COMPONENTS OF A SOLAR MOBILE POWER SYSTEM?

Solar Truck camper

Mike’s Truck Camper – Photo from 2018

Solar power systems are an increasingly popular solution for both off the grid and on the grid power generation. They’re cost-effective and convenient, with solar panel kits widely available for any purpose.

With that being said, you should know that lots of different solar system components go into any system. With so many essential components, it can be helpful to understand why they’re necessary.

What Are the Main Components of Your Solar System?

Remember that you don’t just need to grab one of each of these solar system components and call it a day. You need to make sure they all work together properly. That also means finding dependable, quality brands that you can count on.

Solar Panels?

Of course, solar panels themselves are a big part of your solar electricity system. You can get panels today in a wide range of sizes, providing power in the range of 80 to 300 watts or more per panel.

The number of panels you’re going to need in Canada will vary widely depending on the size of your home and the specific region, due to how much the climate can vary. You could find yourself needing between 7,000 and 15,000 watts of capacity. How can you know how much you need? Find out with our solar panel calculator.

Make sure to go with systems designed for Canada, in particular, when setting up panels to power your home. Efficiency will rely on panel placement, which should always face south for maximum sun exposure. They should also be set up with a tilt of roughly 30 degrees. You can optimize this placement using your exact latitude.

You’ll also have to look into the options for polycrystalline or monocrystalline solar arrays. These are the two main types of panels. Monocrystalline is generally more efficient, although they can be more prone to damage.

Charge Controllers

You can’t simply plug your solar cells into a battery or the grid and hope for the best. You need a charge controller to manage electricity production.

Charge controllers prevent your batteries from taking in too much charge and becoming damaged. There are two different types: maximum power point tracking (MPPT) and pulse width modulation (PWM). Each device provides different levels of control.

The main difference to consider when choosing these solar system components is the voltage. PWM charge controllers require that panel and solar batteries match. MPPT charge controllers require the solar panel operating voltage to be about five volts higher than the battery charging voltage.

You should always check beforehand that your solar system components will work properly together.

Inverters

A primary problem when implementing a solar energy system is that solar panels put out DC power, whereas the electrical grid and your home’s electrical system run on AC power. That means you need to convert from DC to AC. To do that, you need inverters. Systems that aren’t grid-tied typically use a battery-based inverter to keep things simple.

Many solar energy systems will use string inverters. These are designed to run power that’s generated from multiple panels or a single inverter. This arrangement can be even more cost-effective with combiner boxes that connect multiple string inverters.

Running all of the panels in your solar power system can lead to efficiency issues because the weakest link will limit output. Microinverters provide a designated inverter for each panel, preventing this problem. The trade-off is that having more inverters costs more money than simply opting to go with string inverters.

Racks and Mounts

The mounting system that holds your solar panels is fundamental, especially in areas that get heavy snow. You need to make a deliberate choice that factors your region and individual needs.

The most common type of racking is roof-mounted. This keeps all of your solar system components safely out of harm’s way and should give your panels the most unobstructed sunshine possible.

You always want to make sure that a roof-mounted system is properly installed to prevent damage to your roof like leaks.

When roof mounting isn’t possible, some homeowners choose to go with ground mount for their solar electric systems. With this setup, racking is arranged at the appropriate angle to support the panels on the ground. This makes reaching them for cleaning and maintenance easy but can also leave them open to any potential hazards at ground level.

Finding an area without trees or other objects to obstruct ground-level sun exposure can also be hard and in some cases, impossible.

When neither of these options is possible (or for some specific applications), pole-mounted solar panels could be the way to go. These panels are installed on poles, which means that they’ll be high up and get excellent sun exposure but don’t require installation on your roof.

Every situation is unique, so it’s up to you to decide which type of mounting system is suitable for your home and region.

Solar Batteries

It wouldn’t do you much good to only have electricity when the sun is shining at its peak! That’s why batteries are integral solar system components. They give you storage capacity, which means that your solar power system can deliver electricity even after the sun goes down. They’re vital when you want to get the most out of your solar panels.

Your battery bank will be one of the most expensive components of your solar power system, so you need to make sure that you’re getting just what you need. There are two primary choices for solar system batteries: AGM and lithium.

AGM batteries use the same lead-acid chemistry that traditional car batteries do, but with a major upgrade. The absorbed glass mat that gives them their name prevents hydrogen gas release, a major problem for the safety and longevity of traditional lead-acid batteries.

These new batteries provide great storage capacity, safety, and reliability. They’re also relatively inexpensive.

Lithium batteries are also available for solar power systems (think electric vehicles). The main issue is that they’re much more expensive than AGM batteries and they don’t like cold weather.

With that being said, in every other category, they pull ahead. Lithium batteries can handle more charge cycles. They’re also safer and easier to maintain, and they last longer than AGM batteries.

Lithium batteries present a significant price trade-off, so both options are still worth considering.

A Backup Power Source for Your Solar Energy System

You should never rely on a solar energy system without having a backup power source available. When damaged or failed solar system components bring down your system, you don’t want to go without electricity until you can repair or replace them. Installing a backup power source ensures that you’ll always have reliable access to electricity.

For many homeowners, their backup power source is simply the existing electrical grid. Grid-tied systems are standard for installing solar energy systems anywhere other than the most remote locations. This arrangement is simple and convenient but isn’t always the right choice for everyone.

If you look at any kind of facility that can’t go without electricity for even a moment, they’ll have standby diesel generators. They’re incredibly reliable, relatively easy to store the fuel for, and less expensive than some other options. However, if your reason for going solar is environmental, you will likely shy away from the idea of a diesel generator.

Depending on your location, you might investigate wind turbines or even water wheels for backup power. However, these two are subject to many conditions. For real emergencies, even the most environmentally conscious families should have a portable gasoline generator to ensure they don’t go without the absolute necessities. (Please go ahead and share your comments and thoughts below)

System Maintenance:

Taking proper care of your solar power system is essential to the system’s longevity and efficiency.

Almost anywhere in Canada will get more than enough rainfall to keep panels clean. If you do notice them getting dusty during a particularly dry spell or otherwise covered in debris, you can simply spray your panels down with a household hose.

During the winter, you’ll have to keep them clear of snow for them to work. There are extendable tools designed for this task that make clearing snow a breeze. Whatever you do, never try to defrost panels with hot water. The temperature difference will crack the panels right away.

Learn more about Solar:

It’s easy to make sure that you get everything you need and that it’s all compatible and high-quality when you go with solar power components from Power My Home.

Read More

HOME BACKUP POWER. COMFORT. SECURITY. CONVENIENCE.


Despite Supply chain disruptions, we stock 3 different sizes and we bring them in every month or two.
Cummins Generators are preferred by 3 out of every 10 homeowners who invest in home backup power.

A home generator provides an on-demand source of power in the event of a utility grid failure. While more costly to purchase and install, a standby generator eliminates the setup and headaches associated with the use of a portable generator—such as regular refueling, running many feet of extension cords, and listening to the constant hum of the engine. These generators are also good for Off-grid setups as they will directly communicate with Inverters and chargers to turn ON/Off Automatically.

Home generators vary in type, size, watts, and fuel source (either propane or natural gas, or diesel). Based on the amount of power you need and your installation requirements, you can decide on the generator that is right for you. A portable generator is cost-effective and best for keeping essential items up and running, These larger, permanently installed generators are capable of sustaining appliances, central heating or cooling systems, lights, devices, and more. Keep in mind that standby generators should always be installed with a transfer switch to prevent back-feed that can cause harm to your home’s electrical system, the generator, or serious injury and death to utility workers.